The following steps are a guide to creating a Non-Inventory Purchase Order. Non-Inventory Purchase Orders (POs) are used to track non-inventory items. Below are the instructions on how to enter Non-Inventory POs.
FreshByte has the option to create Non-Inventory Purchase Orders (POs) which can be used to track non-inventory items such as equipment, parts, repairs, utilities, rent, or items not directly associated with the cost of the product. Non-Inventory POs do not affect the GL. They are a holding place in the system for monitoring purposes only and can be used if the vendor requires a PO. The GL entry would be applied later when the payable invoice is created.
Non-Inventory Purchase Orders
Purchases ‐> Orders (Non-Inventory)

Purchases ‐> Orders (Non-Inventory) ‐> New
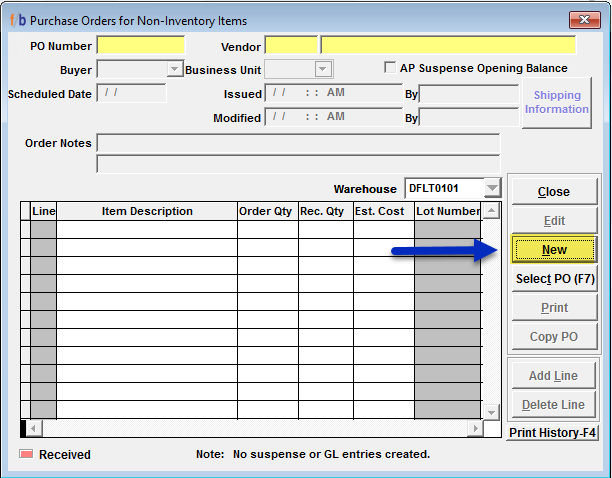
From the Purchase Order screen, select NEW. FreshByte will populate the VENDOR LIST lookup menu.
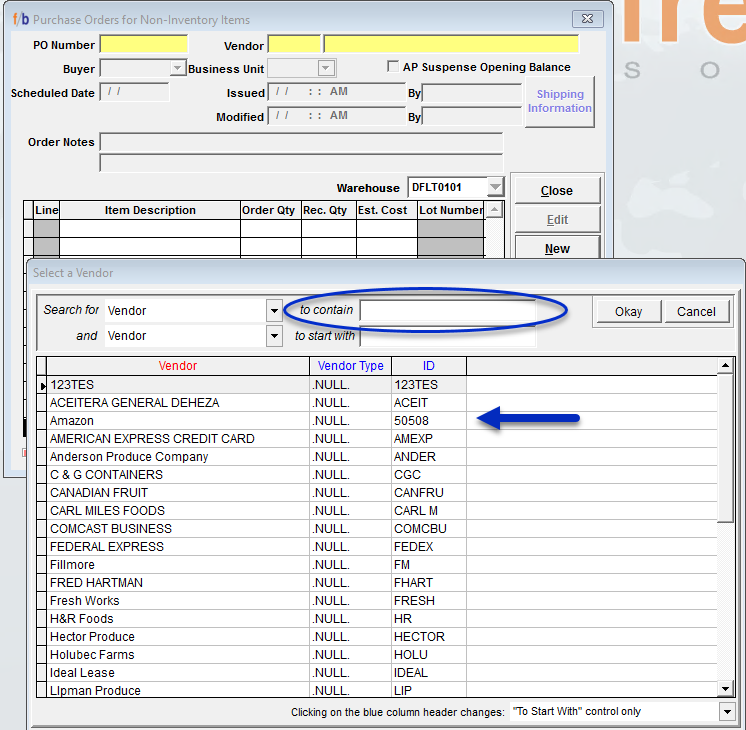
Search for the vendor (to contain or start with) field and begin typing any part of the vendor’s name. Select the vendor by double-clicking on the vendor name or by highlighting the vendor and selecting OKAY. The vendor information will populate in the header of the PO.
If there are multiple warehouse locations, a screen will appear with the option to select the warehouse where the purchase order items will be received.
Note: The warehouse can be changed at the time of receiving if needed.
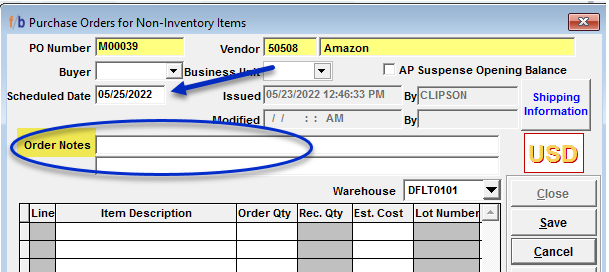
Continue to complete each section. Buyer code if applicable. The scheduled date will automatically populate with the current date. The date should be revised to the anticipated arrival date
ORDER NOTES: This section will display the notes or instructions for the vendor and will be seen on the printed purchase order.
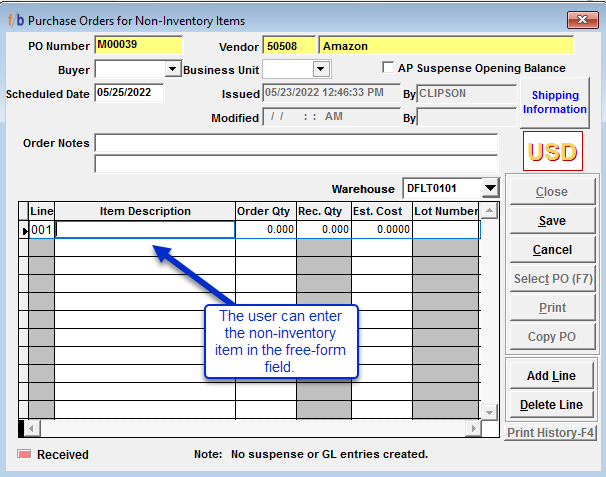
Begin adding the PO line items by selecting ADD LINE
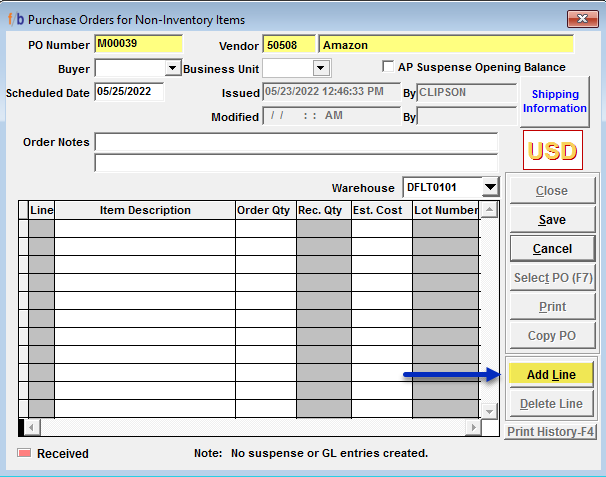
Once ADD LINE is selected, a line is created where the user will enter the description of the non-inventory item. Continue by adding ORDER QUANTITY and EST. COST of the item.
Continue to add items by repeating the steps above.
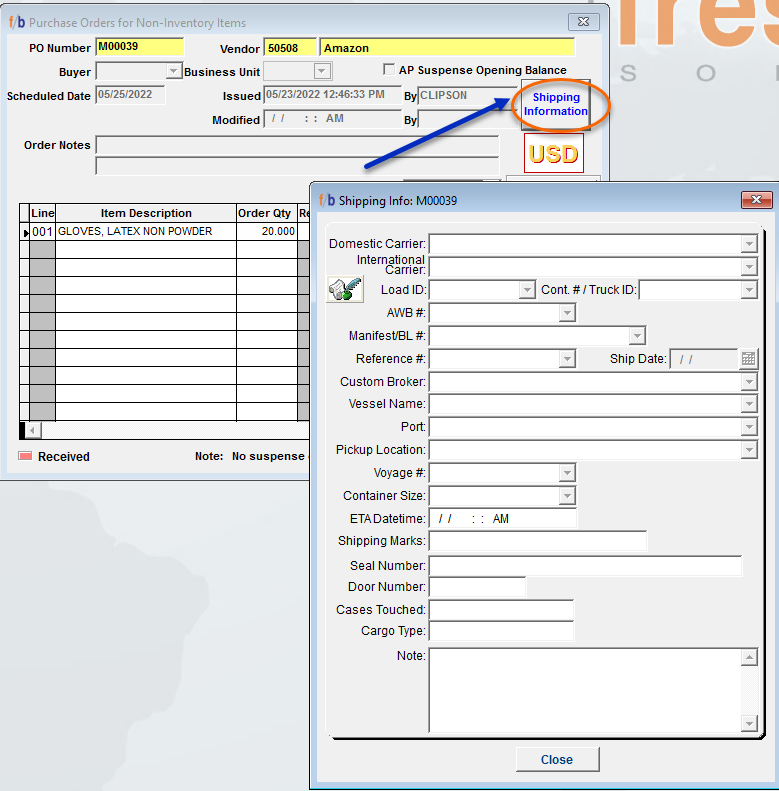
The User has the option to select "Shipping Information". to enter additional shipping information details. If selected, the below screen will display for the User to enter in details received by the Vendor. The PO can be modified to include additional information at any time before receiving the PO.
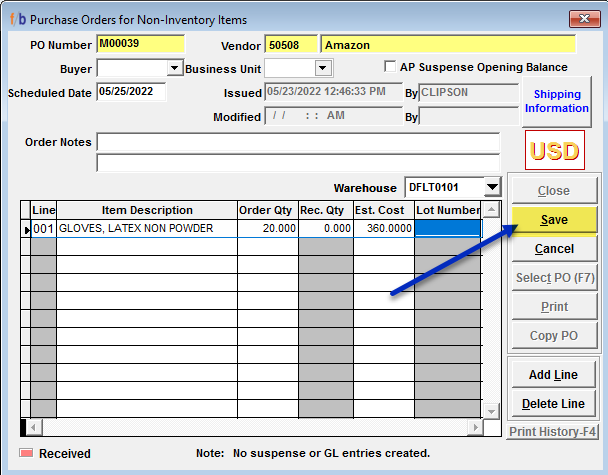
Once the PO form is complete and correct, place the cursor in the SAVE field on the top right.
Selecting PRINT will provide the option to print a physical copy and/or email the copy to the vendor.
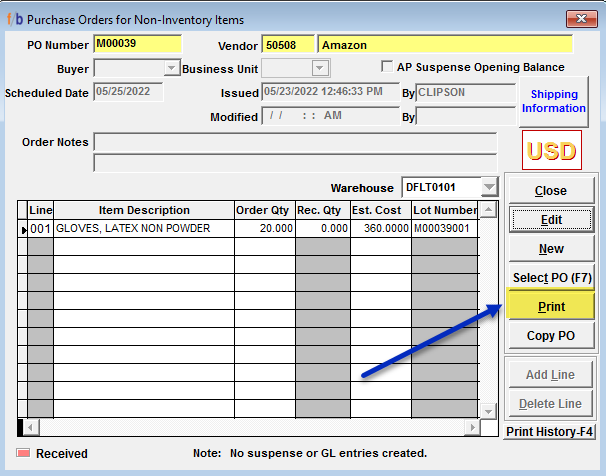
*Note: The Vendor’s email must be entered in additional email settings on the Vendor Master in order to send the document via email.
