FreshByte has the option to email Vendor documents directly through the system. Different recipient addresses can be added per document. Additional recipients can be set up within each tab to allow for multiple email addresses per document.
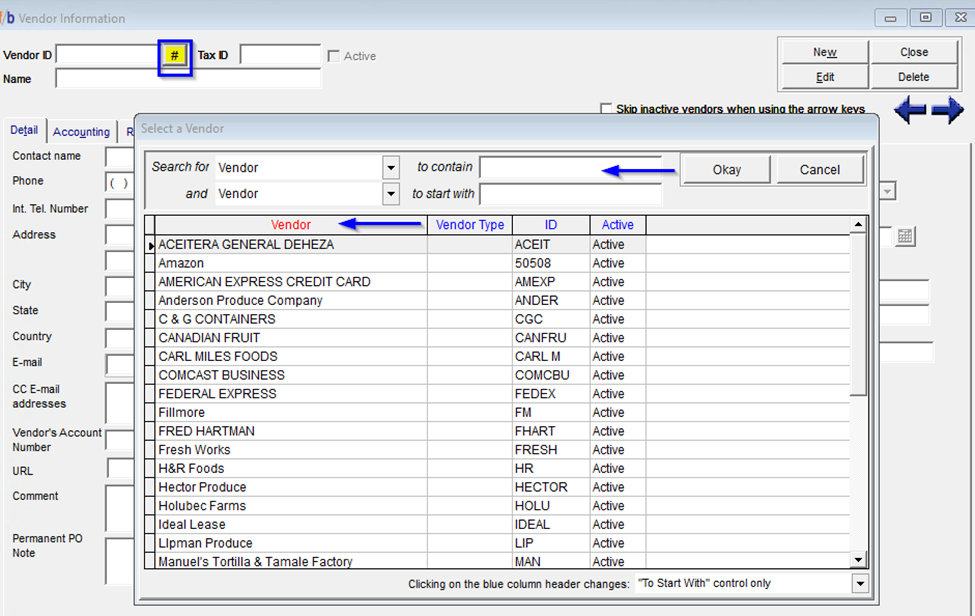
From the Vendor Master, select the (#) Button next to the Vendor ID. FreshByte will display the VENDOR LIST look up menu. Search for the Vendor (to contain or start with) field by typing any part of the Vendor’s name. Select the Vendor by double-clicking on the Vendor Name or by highlighting the Vendor and selecting OKAY. The Vendor information will then populate in the Vendor Master file.

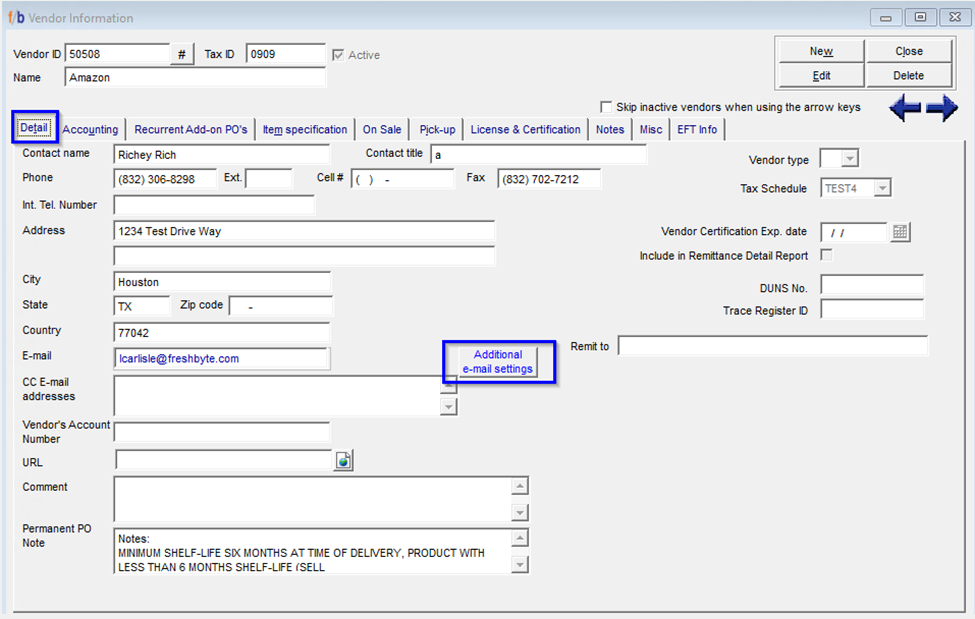
Select the “EDIT” button on the top right of the screen, then select “Additional e-mail settings” on the first tab example is shown below.

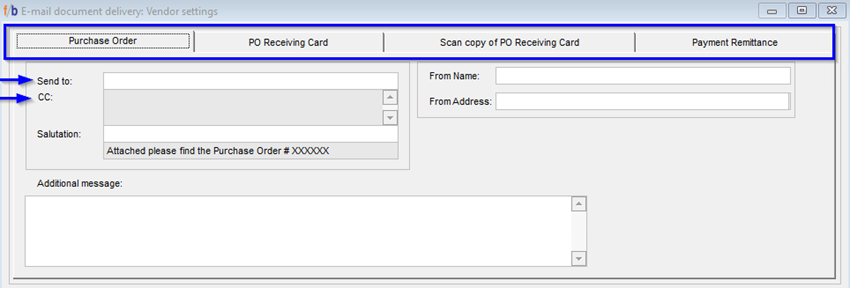
The additional Email Settings screen will display. Select the applicable tab, then add the email address. The CC: is where the user can add additional email addresses.

If the user would like the specific document to be updated to display a sender that is different from the default Company email address in System Settings, the User can update the “From Name” field. FreshByte will then override the general email settings and populate the updated information when sending the email for that specific vendor and document only. Repeat the above steps for each tab and Vendor as needed. An additional message can be created and stored from this screen to display in the body of the email when sending the document to the vendor.
Once the information is complete and correct, close the additional window and place the cursor in the SAVE field on the top right of the main screen.

