FreshByte has the option to process Credit Card and ACH payments through the system. Instructions are listed below for Credit Card set up. The company must be registered through CardConnect.
FreshByte has the option to process Credit Card and ACH payments through the Payment Refund Center. To setup and use Credit Card processing in FreshByte, the Company must be registered with CardConnect. The Users responsible for accepting and processing Credit Card payments must have the required Security Settings enabled to access the Quick Payment Entry screen.
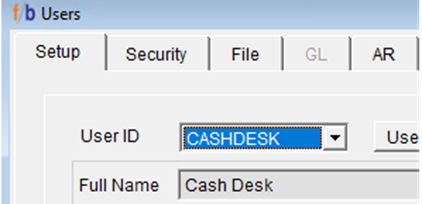
File -> Users Security
Select the User from the User ID drop-down menu then select the AR tab.
Note: Not all options need to be selected in the Security Settings. The required minimum access for Credit Card functionality is the “Cashier Desk/Quick Payment Entry screen” and “Enter Open Receipts in Quick Payment Entry.” The Company may want to limit access to Refunds.
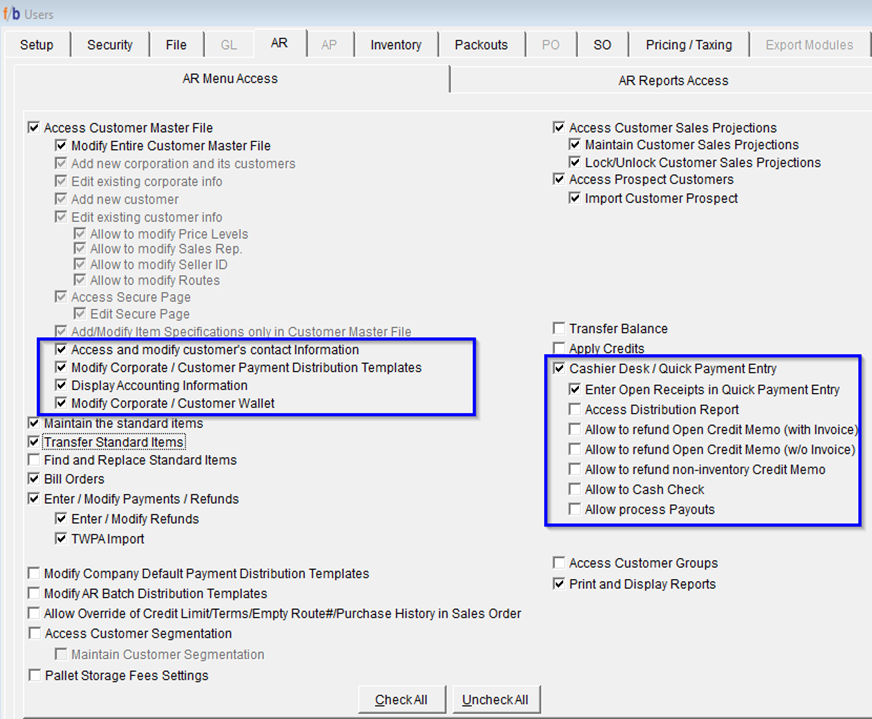
To allow the User access to add New Credit Cards to a Customer File,
“Modify Corporate /Customer Wallet” must be selected in User Security Settings as shown above.
Once User Security is complete, Payment Instruments must be set up in Code Maintenance.
File -> Code Maintenance -> Payment Instruments
Select Go -> New
From this screen, enter the Credit Card providers that are accepted. (Visa, Mastercard, AMEX, Discover). Select the bank account where the Credit Card Payments deposit. The Credit Card Name and Bank association name should be entered as part of the Code name to ensure that the user is selecting the correct Credit Card and bank association.
*Note: The Credit Cards and Bank Association are what is provided to CardConnect.
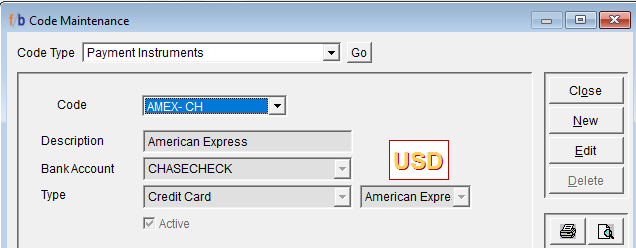
Once completed, the New Payment Instruments must be enabled in “Company Default Payment Distribution Template”.
Customers -> Company Default Payment Distribution Template
Add the new instruments in AR Batch Distribution Templates and the Company Default Payment Distribution template screens. Create the Credit Card Distribution Templates based on how each Credit Card’s end of day is batched out. Create a separate batch for ACH Payments and make sure to link to the correct bank of there is more than one.
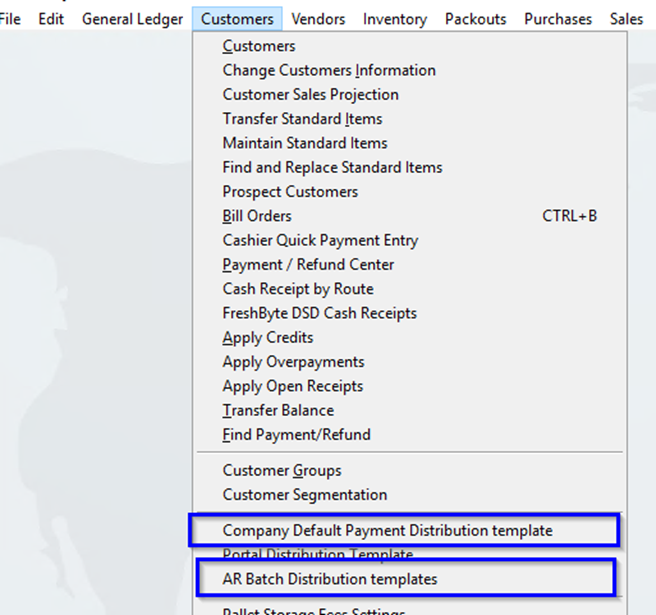
Next, Cashier Lanes must be set up for each User that will be processing Credit Card or ACH Payments.
Note: Please contact FreshByte Support if you need help setting up Cashier Lanes.
Options -> Modules -> Point of Sale
Header information will already be populated by FreshByte which includes the Profile Name and your CardConnect Client ID.

Once the above setup is complete, the User can add credit cards to the Customer Master File. The User must open the Customer Master File, then access the Customer Wallet.
Customer -> Customer Master ->
Credit Cards can be added to the Customer Master file on the Corporate tab or Customer Tab.
Note: If the User enters the Credit Card on the Corporate Tab, the Credit Card is available for all customers associated with the Corporate Company. If the User enters the Credit Card on the Customer (1) tab, the Credit Card is available for that Customer only.
Select the Wallet Button on the bottom right of the screen.
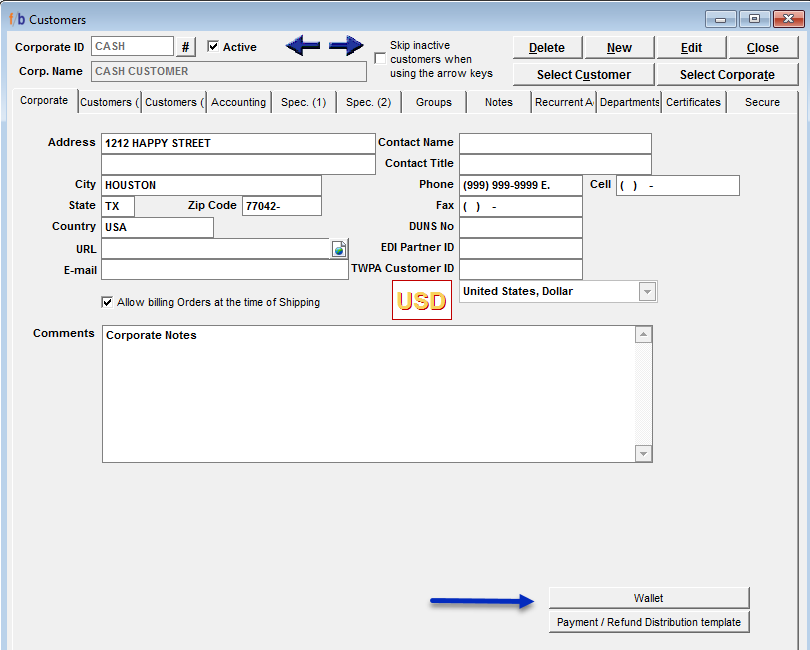
The below window will display. From the Customer Wallet Screen, Select “ADD NEW”.
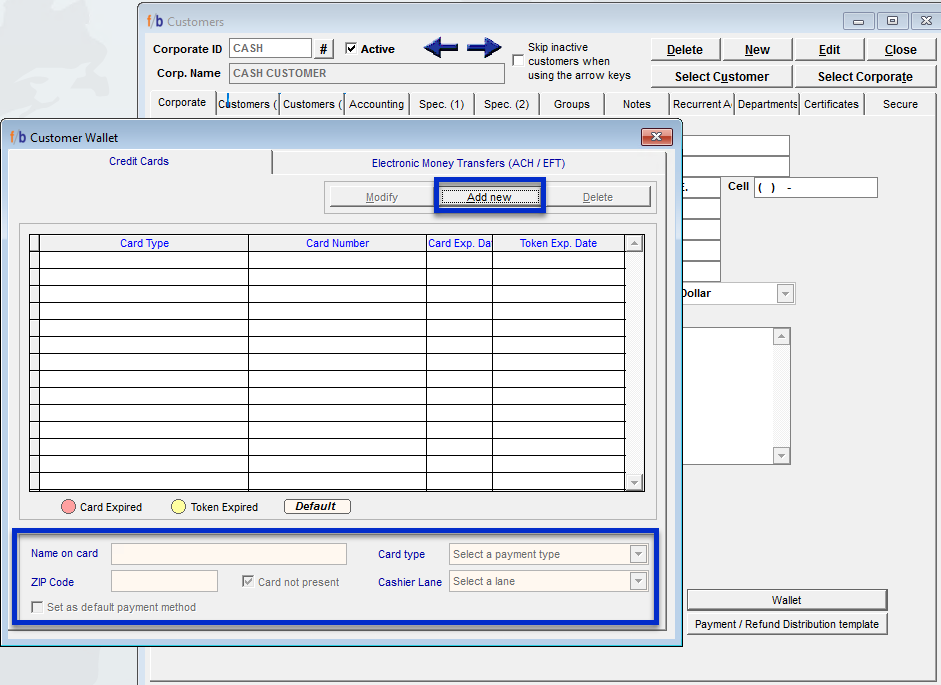
Complete each section at the bottom of the screen. Assign a Cashier Lane from the drop-down menu and select Activate. Select “Set as default payment method” if the Credit Card will be the default payment for the Customer. The User will be redirected to the internet webpage, Tokenizer.

In Tokenizer, the User will enter the Credit Card number, CVV, and Expiration date. Once all the information is complete, select the ‘Tab’ key on the keyboard and return to FreshByte. The Credit Card name and the last 4 digits will be displayed in the Customer Wallet.
*Note: If “Authentication Failed” is displayed, the card information was not entered correctly, or the Zip Code is incorrect. The User will also receive Authentication Failed if a Cashier Lane has not been assigned.

