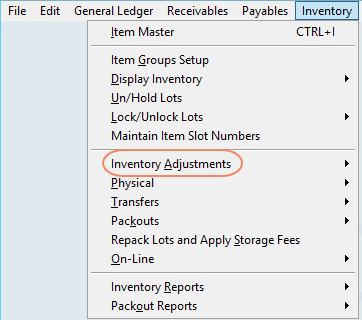
Inventory Adjustments are made when there is a need to correct inventory to balance to physical counts, adjust the on-hand availability, return product to a vendor, or to remove damaged/spoiled product.
Inventory Adjustment Reasons
To process Inventory Adjustments, Adjustment Reason Codes must first be set up in Code Maintenance.
Inventory -> Inventory Adjustments

Creating Inventory Adjustments
Inventory Adjustments (Used for a single adjustments)
Click SELECT and the system will display the list of Inventory Items. Choose the item to be adjusted and select ‘Okay’.

To see detailed information for the selected item, select the FLASH button on the top right of the screen. The flash screen provides the user with detailed information about the inventory item. The user can select each column to view details within the tabs. Select CLOSE on the FLASH screen to return to the adjustments screen.


There are (4) options available when entering Individual Inventory Adjustments
1- Select the Lot from the dropdown menu. The drop-down menu only displays lots with remaining inventory within the system.
2- Select the ‘Show all Lots’ button under the Adjustments section to display lots that have no remaining inventory in the system. This will allow the user to adjust inventory into the lot.
3- Select ‘New’ To add Inventory into the system that does not have a lot number associated with it. Adding inventory without selecting a lot from the dropdown menu will create a System Lot (S-Lot). When creating an S-Lot, the user will be required to enter an Inventory cost for the new lot.
4- NOTE: By selecting WRITE OFF and then APPLY, the entire Lot will zero out and cannot be reversed.
After selecting the corresponding lot option, the user must do the following:
- Select the “Reason” for the adjustment from the drop-down menu.
- Enter the date for the adjustment. *This is especially important as Inventory will only be available as of adjustment date.
- Enter the “Adjust On-Hand By:” quantity. To reduce the on-hand quantity enter the amount as a negative. (EX: -5) The system displays the “after adjustment” below. Review carefully.
- Enter an “Adjustment Comment” if desired. If entered, adjustment notes are available on reports.
- Select APPLY to post the adjustment.
- A pop-up window will display ‘Post this adjustment?’ Select Yes
Inventory Adjustments (Bulk)
- Select “Inventory Adjustments (Bulk)
- Enter the date
- Select the Warehouse
- Select the Reason code.
- Enter an Adjustment Comment if desired.
- Select “F2” or “S-F2” and select the Item(s) to be adjusted.
- Select the UOM
- Select the Lot Number to be adjusted. (Only lots with remaining quantity may be selected)
- Enter the “Adjust Qty.” (To reduce inventory, the quantity must be entered as a negative)
- Repeat steps 6 – 9 for each item to be adjusted
- Select APPLY
- Select YES to post the adjustments.

Inventory Clean Up
Inventory Cleanup is used to write off lots with a remaining balance of less than 1 master unit.

- Select the Inventory Item(s)
- Select the Warehouse
- Select the Adjustment Reason
- Enter the “AS OF” Date
- Select CLEAN UP to adjust the selected items.
