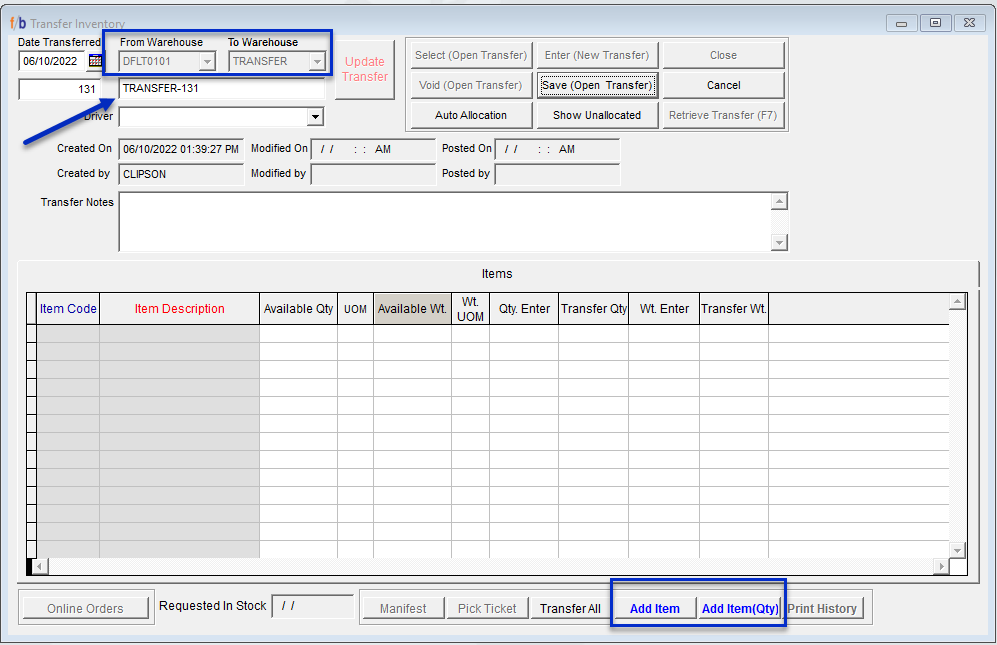
Instant Transfers are used to move Inventory from one warehouse to another. Below are the steps to create an Instant transfer and post the transfer in the system.
Inventory – > Transfers –> Instant Transfer

Select the From Warehouse and To Warehouse drop-down menus from the drop-down menus
• Click on Enter (New Transfer)

- Date Transferred field will default to the current date. The User can change the date by entering the preferred date or selecting from the calendar icon.
- The transfer ID will auto-populate into the field below the date.
- The transfer description will auto-populate below the warehouse fields. The user has the option to change the transfer description using a maximum of 20 characters.
- If applicable, enter the Driver from the drop-down (Drivers must be set up in Personnel to be selected.)
- Enter any notes into the Transfer Notes section
- The user has the option to display all inventory for the item or display unallocated quantities only.
- Add the item to be transferred:
- There are two options when selecting to add an item to the transfer:
- Add Item – displays the list of available items.
- Add Item (Qty) – displays the list of items as well as the quantity available to transfer.
- Select the item(s) to be transferred by double-clicking on the item or highlighting and selecting Okay. The selected item(s) will populate in the bottom portion of the transfer screen.
- Enter the quantity to be transferred in the field labeled Qty. Enter field.
- Double-Click on the quantity entered in the Qty. Enter field. This will display the Lot Assignment screen for the Available Qty.


- Once the Selected, CS is equal to the Ordered, CS – select OK to return to the transfer form
- Select Transfer All at the bottom of the screen. The quantity to be transferred will populate in Red in the Transfer Qty field.
- Select Save (Open Transfer) at the top of the screen
- To post the transfer, select Update Transfer


In System Settings, there are options

Defer Allocation Reservation: If this item is left unchecked, the Qty. Enter will be automatically allocated using FIFO. The lot can be changed but will not automatically create a Z-lot. In addition, this allows the user to enter the quantity in the Transfer Qty field rather than selecting the Transfer All option.
