The following steps are a guide to creating Shipping Routes for Sales Orders.
Sales -> Shipments
Shipments are used to build a route. The route information flows from the Sales Orders that are entered into the system. There are a few key differences between Shipments and the Shipping screen. Shipments allow companies to do the following:
- Add Purchase Orders to be picked up from Vendors
- Assign Driver, Vehicle, Trailer, Miles In/Out
- Cash/Check Reconciliation by Route
- Reprint Route Sheet Identical to the Original Route sheet that was sent.
In order to create a Shipment Report, there must be at least One Sales Order for the selected date with an assigned route. Shipments may be created prior to all orders being entered. As new sales orders are created and a route number assigned, the sales order will automatically be added to the shipment report that has been created.

The Shipment Report allows the User to enter the following information:
- Assigned Picker
- Driver
- Truck
- Mileage in and out
- Cash and Check total upon Driver’s return
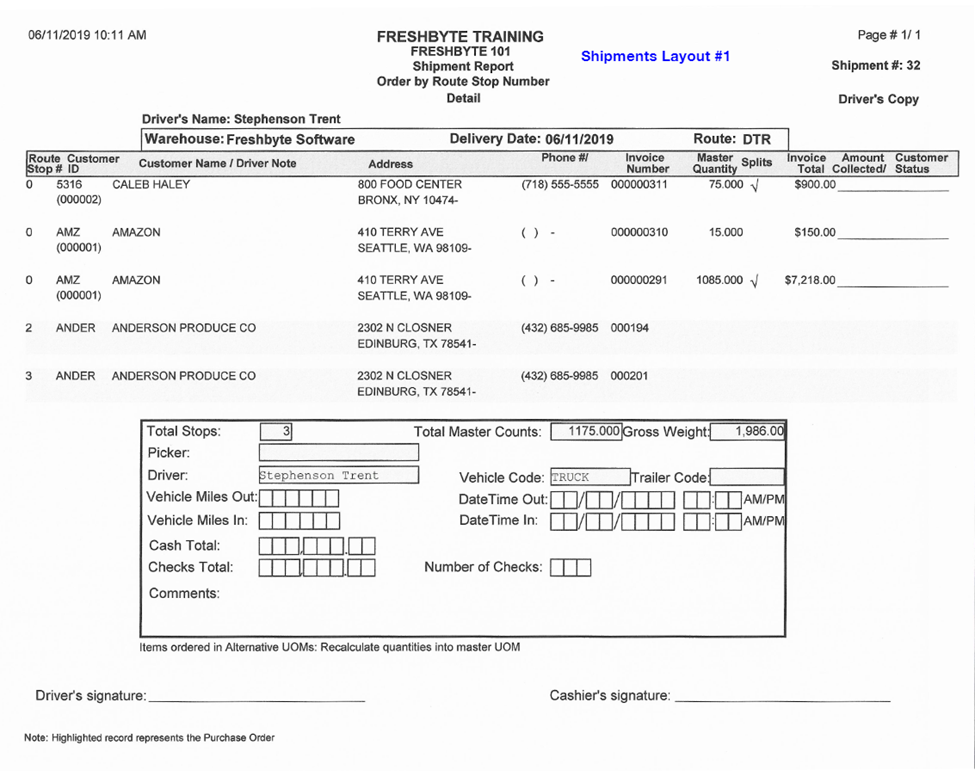
There are 4 report layouts for the User to choose from
To Create a Shipment
Sales -> Shipments
Select “New” and fill out the Required Fields (highlighted below.) The user can
complete additional information in the Shipments Header.
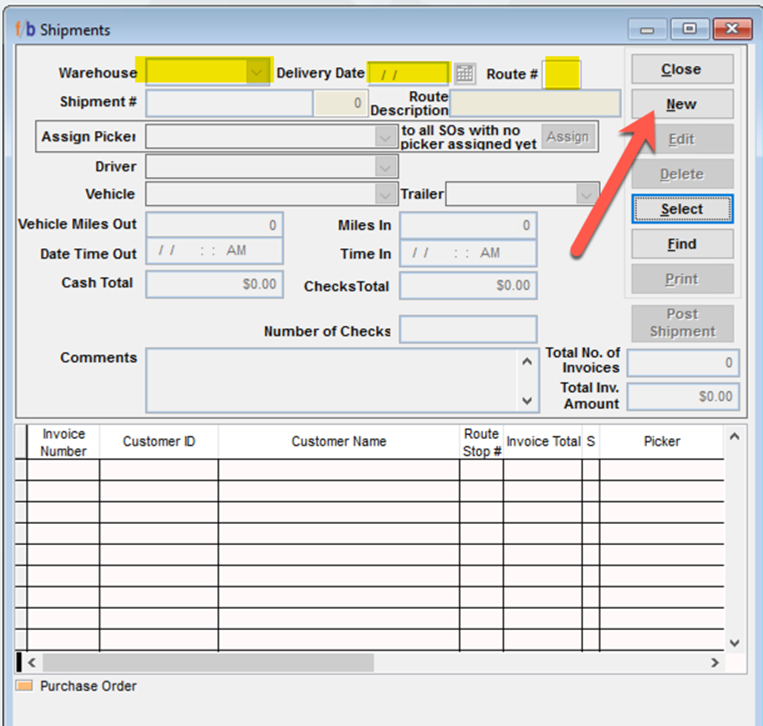
The Shipments Report will populate with all sales orders that match the Selected Date and Route. As additional orders are created with matching criteria, they will automatically populate into the shipment.
Note that the Shipments includes ALL order types (Open, Delivered, and Billed)
Purchase Orders designated as a pickup can also be added to the Shipment by the User. To add a PO, select ADD PO at the bottom of the screen.
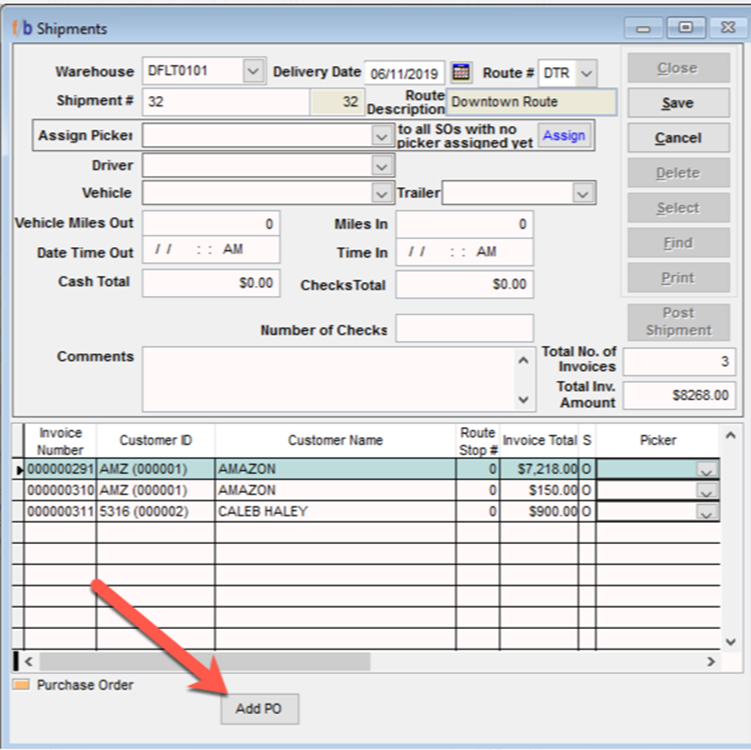
The user will select the PO’s to add to the shipment. Note, the Shipment screen does not restrict PO’s based on date as it does with sales orders being added to the route. PO’s may be assigned a stop on the route for the shipment.
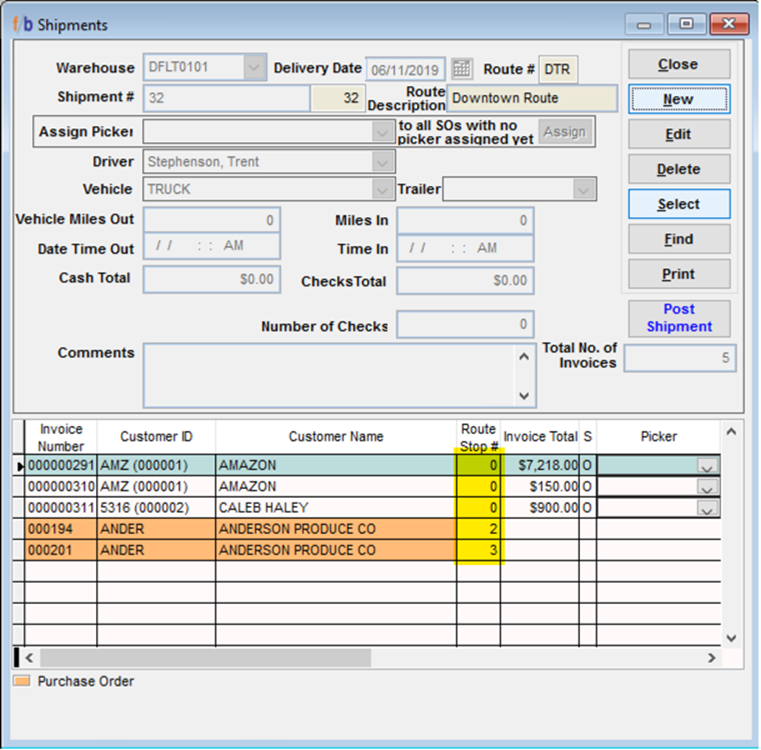
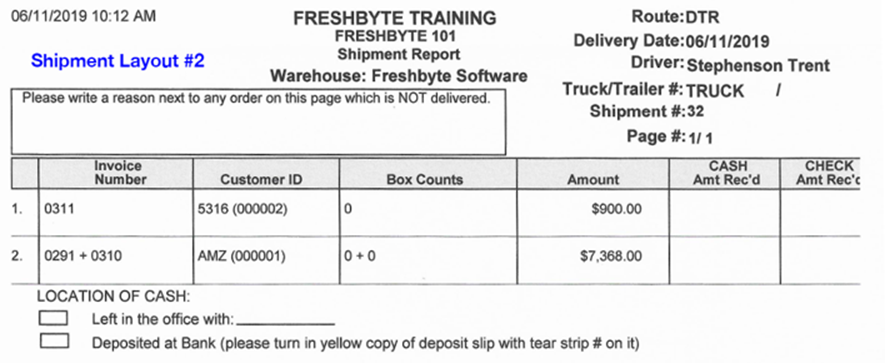
To Print Route Sheet, select PRINT. Choose the layout and preferences in the PRINT screen. There are multiple layouts that the user may choose. Examples are below.
Finalize Shipment
Upon the driver’s return, the user
may enter the total Cash and total of Checks received. Comments may also be added to the Shipment.
Once all information is entered and the Shipment has been completed, select POST SHIPMENT. This posting has no impact on the G/L. Posting of the Shipment is simply a way to LOCK the shipment so no further changes may be made. Once the Shipment is posted, no additional invoices for this date and route will be added.
Note:
The following options can be selected in System Settings -> SO (3) – Shipments
Require Driver and Vehicle
Add Purchase Orders to Shipment
Default Delivery Date: A) Use current date B) Use next calendar day
