Creating a new Vendor Master
A Vendor Master file is required for each Vendor. Vendors must be entered in the Vendor Master before a purchase order can be entered. Vendor Masters should be created for all types of purchases, such as inventory items, freight, and expenses.
To create a Vendor Master
- Go to Vendors ‐> Vendors
- Select NEW
- Enter a Vendor ID (maximum of 6 characters, alpha‐numeric, and no special characters)
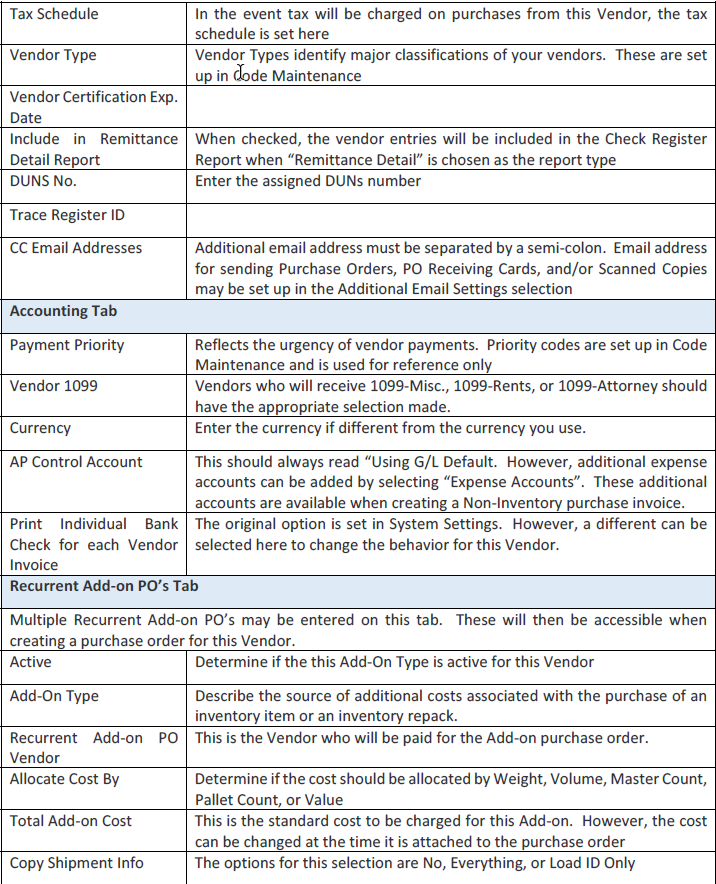
These are the only entries required to save the Vendor Master and create a purchase order. However, it is recommended to enter as much information as possible. Following is a list of the suggested entries as well as other possible options.
Additional Vendor Master Settings
Although not required, the following options are important to consider when setting up the Vendor Master. These items can be changed at any time.- Contact Information ‐ complete as much contact information as possible including email addresses.
- Tax ID – This is important if this is a Vendor who will receive a 1099 at year’s end.
- Remit to – Used if the remit to name is different from the Vendor Name
- Net Due Days
- Payment Discount Days – The number of days in which a discount is received upon payment of the invoice.
- Payment Discount percentage – The discount percentage that will be received if the invoice is paid within the payment discount days.
- Credit Limit – The amount of credit granted by the Vendor
Optional Vendor Master Settings
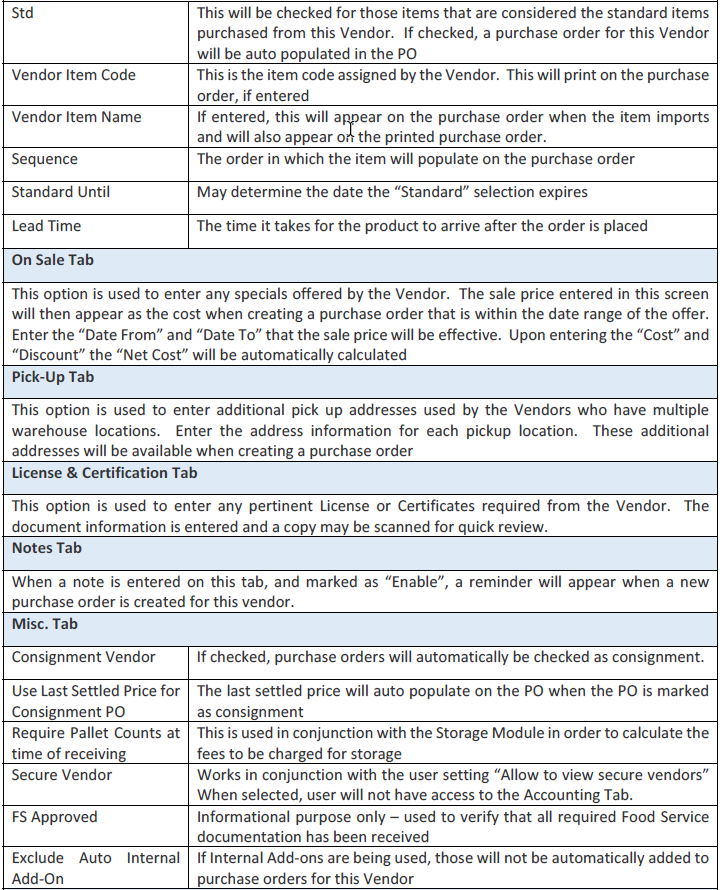
The following is an extensive list of the remaining options and settings available on the Vendor Master along with a brief description of each.


